4 sections
Article Writer
Generate single SEO-optimized AI articles from a keyword or topic.
On this page
Before You Start (Prerequisites)
Before you can generate and publish articles, complete these setup steps:
Checklist
- Install the WordPress Plugin (recommended for SEO fields) — See tutorial
- Connect your WordPress site with an Application Password — See tutorial
- Set up your sitemap (for automatic internal links) — See tutorial
- Have enough credits — Article generation costs 10 credits
No WordPress site? You can still generate articles without a connected site. You'll get the option to download the article as a Word document instead.
Generating an Article
The Article Writer is the home page of the dashboard. It generates a single SEO-optimized article using AI.
Steps
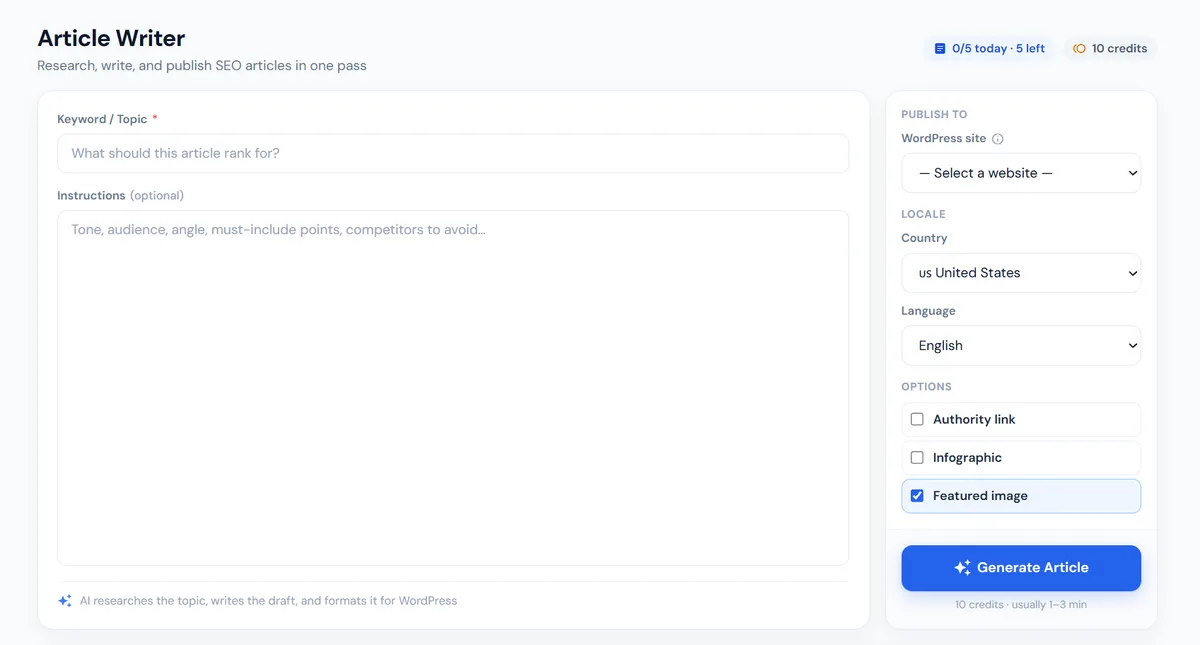
- Select your WordPress Site from the dropdown (or choose "+ Add a website" to connect one)
- Enter your Keyword / Topic — this is the main subject (e.g. "best running shoes for beginners")
- Optionally add Extra Instructions — tone, sub-topics, examples, specific requirements (e.g. "include a comparison table", "write in a casual tone", "target 2000 words")
- Select a Target Country for research localization
- Select the Article Language
- Select options, if you want to add external link, infographic or featured image
- Click Generate Article
Generation Process
You'll see a progress timeline as the AI works through several phases:
- Research & scraping — Gathers information from the web
- Building prompt — Creates a tailored writing prompt
- Writing article — AI generates the full article
- Processing — Adds internal links, formats HTML
- Featured image — Generates an AI featured image
- Infographic — Generates an infographic
- Finalizing — Prepares for preview
The full process takes about 60–120 seconds.
Pro tip: Be specific with your topic. "Best running shoes for flat feet under $100" will produce a much better article than just "shoes".
Publishing or Scheduling
After the article is generated, you'll see a full preview with metadata fields you can edit.
With a WordPress Site Connected
A metadata card appears above the preview with:
- Title — The article title (editable, max 55 characters for SEO)
- Slug — The URL path (auto-generated, editable)
- Meta Description — SEO description (editable, max 160 characters)
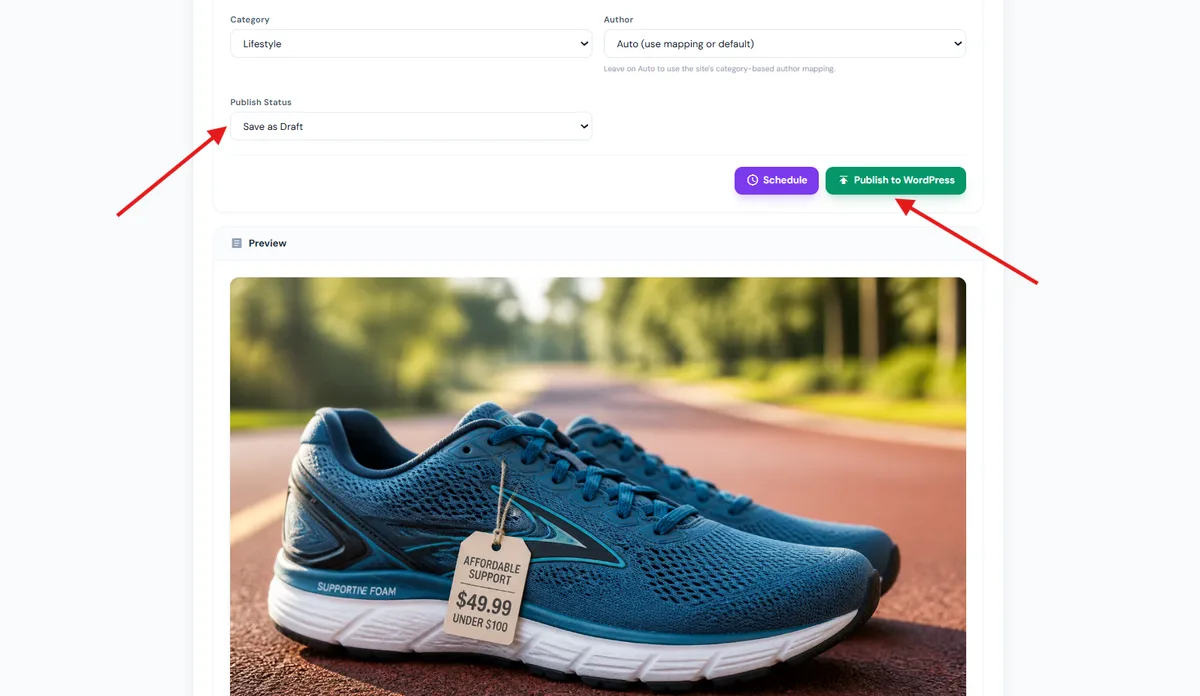
- Category — Select from your WordPress categories
- Publish Status — "Save as Draft" or "Publish"
You have two options:
- Publish to WordPress — Immediately sends the article to your site
- Schedule — Pick a date and time to publish later (opens a quick scheduling modal)
Without a WordPress Site
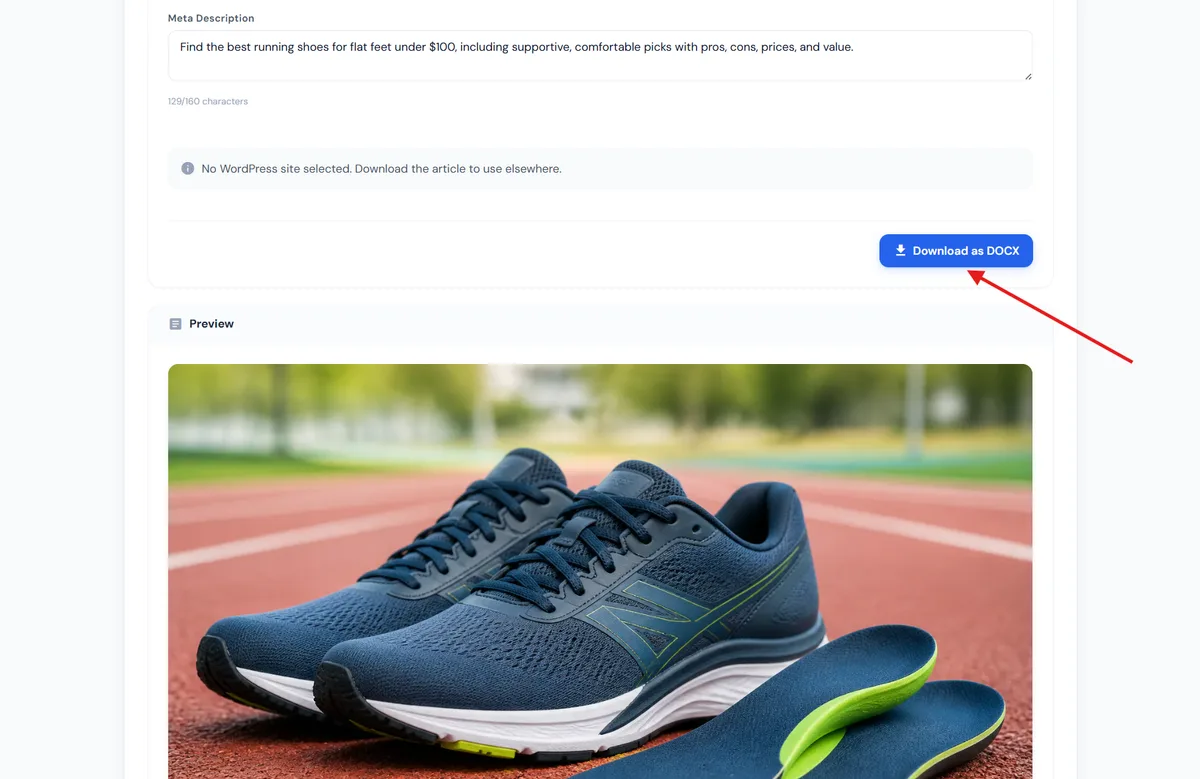
If no site is selected, you can Download as DOCX to save the article as a Word file for use elsewhere.
Draft recommended: Using "Save as Draft" lets you review the article in WordPress before making it live.
Internal Linking
When a sitemap is configured, WP Auto Post automatically adds relevant internal links to generated articles.
How It Works
- During article generation, the system fetches your sitemap
- It finds the most relevant existing pages on your site
- It naturally inserts 2–3 internal links distributed across different sections of the article
Requirements
- Your Post Sitemap URL must be set in your site settings — See tutorial
- The sitemap must be publicly accessible
New sites: If your site has very few posts, internal linking will be limited. As you publish more content, the feature becomes more effective.